 |
|
AN ON-LINE
STITCH & TAPE MANUAL |
|
Stage 2 - Joining the Lengths of Hull Plank/Panel Together |
|
| For
most plywood canoes up to 16' (4.88m) in length each full hull
plank/panel length is made up of 2 parts - the aft part and the forward
part, which are mirror images of each other joined along the centre
seam. The centre seam is simply the left hand edge of the sheet of ply
from which the plank shapes were cut.
There are different ways of making this join - some use a scarf join and others use a plywood butt join. Most use a simple glass tape butt join where glass tape in epoxy is applied to both sides of the plank/panel across the join. this may seem like a fairly weak join but, when the planks/panels are all stitched and taped together, it is more than strong enough. |
|
 |
 |
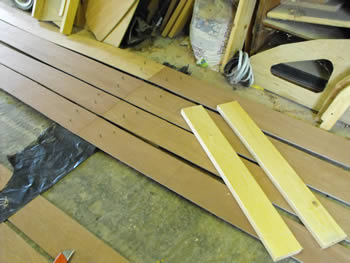
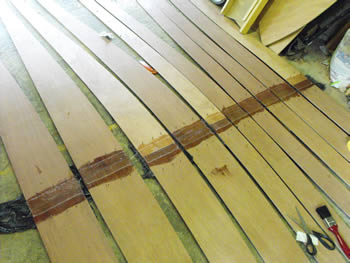
| 13.
Each half of the plank length is
joined with a simple glass tape butt join—I used 2 strips of wood on
the floor, covered with a bin bag (to prevent the planks from getting
glued to the wood) and nailed through the planks into the wood clear of
where the glass tape is going to go, to hold the panels in their correct
place and flat. |
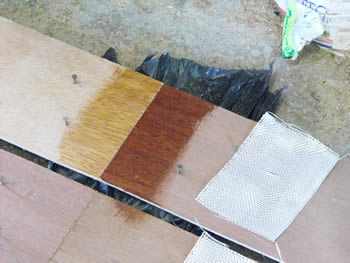
14.
Cut the glass tape ready
for each panel/plank and brush epoxy resin (mixed with it’s hardener)
onto the join area. |
 |
 |
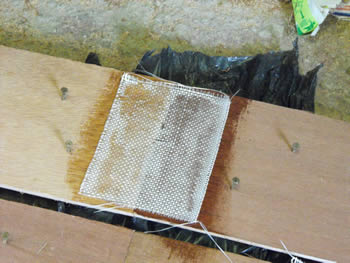
| 15.
Lay the tape in
place and brush it so that the resin starts to soak it out (wet the
glass tape through). |
16.
Go over the tape with more resin if
required until it is fully wetted out. |
 |
|
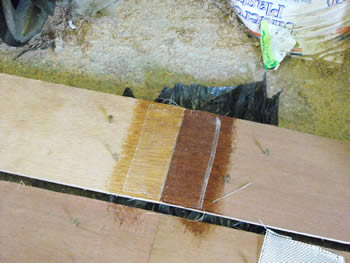
| 17.
Once the tapes on one side of the panels/planks have cured (leave
over night) carefully remove the nails holding the planks in place and
turn them over and repeat the process on the other side. |
|